This is a build tutorial for the Luke ESB hero lightsaber as it is currently considered most screen accurate.
It probably will take around 2 to 3 hrs to complete, assuming you have all parts and tools available.
OK, let’s start!
1. Collect all tools and parts

- Luke ESB set (T-tracks, Kobold clip, D-ring, edge connector, screws, metal tape, rivets)
- Vintage 3-cell vintage Graflex flash handle
- Additional red Graflex button
- Rotary tool (a Dremel for example) & bits
- Miter saw (I use a small table circular saw)
- Transparent scotch tape
- Permanent pen & marker (able to mark the black T-tracks)
- Cross head screw driver
- Epoxy glue & wooden spatula
- Drill & bits (2.5 and 4.0mm)
- Rivet gun
- Box cutter
- Narrow file
- Sandpaper (fine)
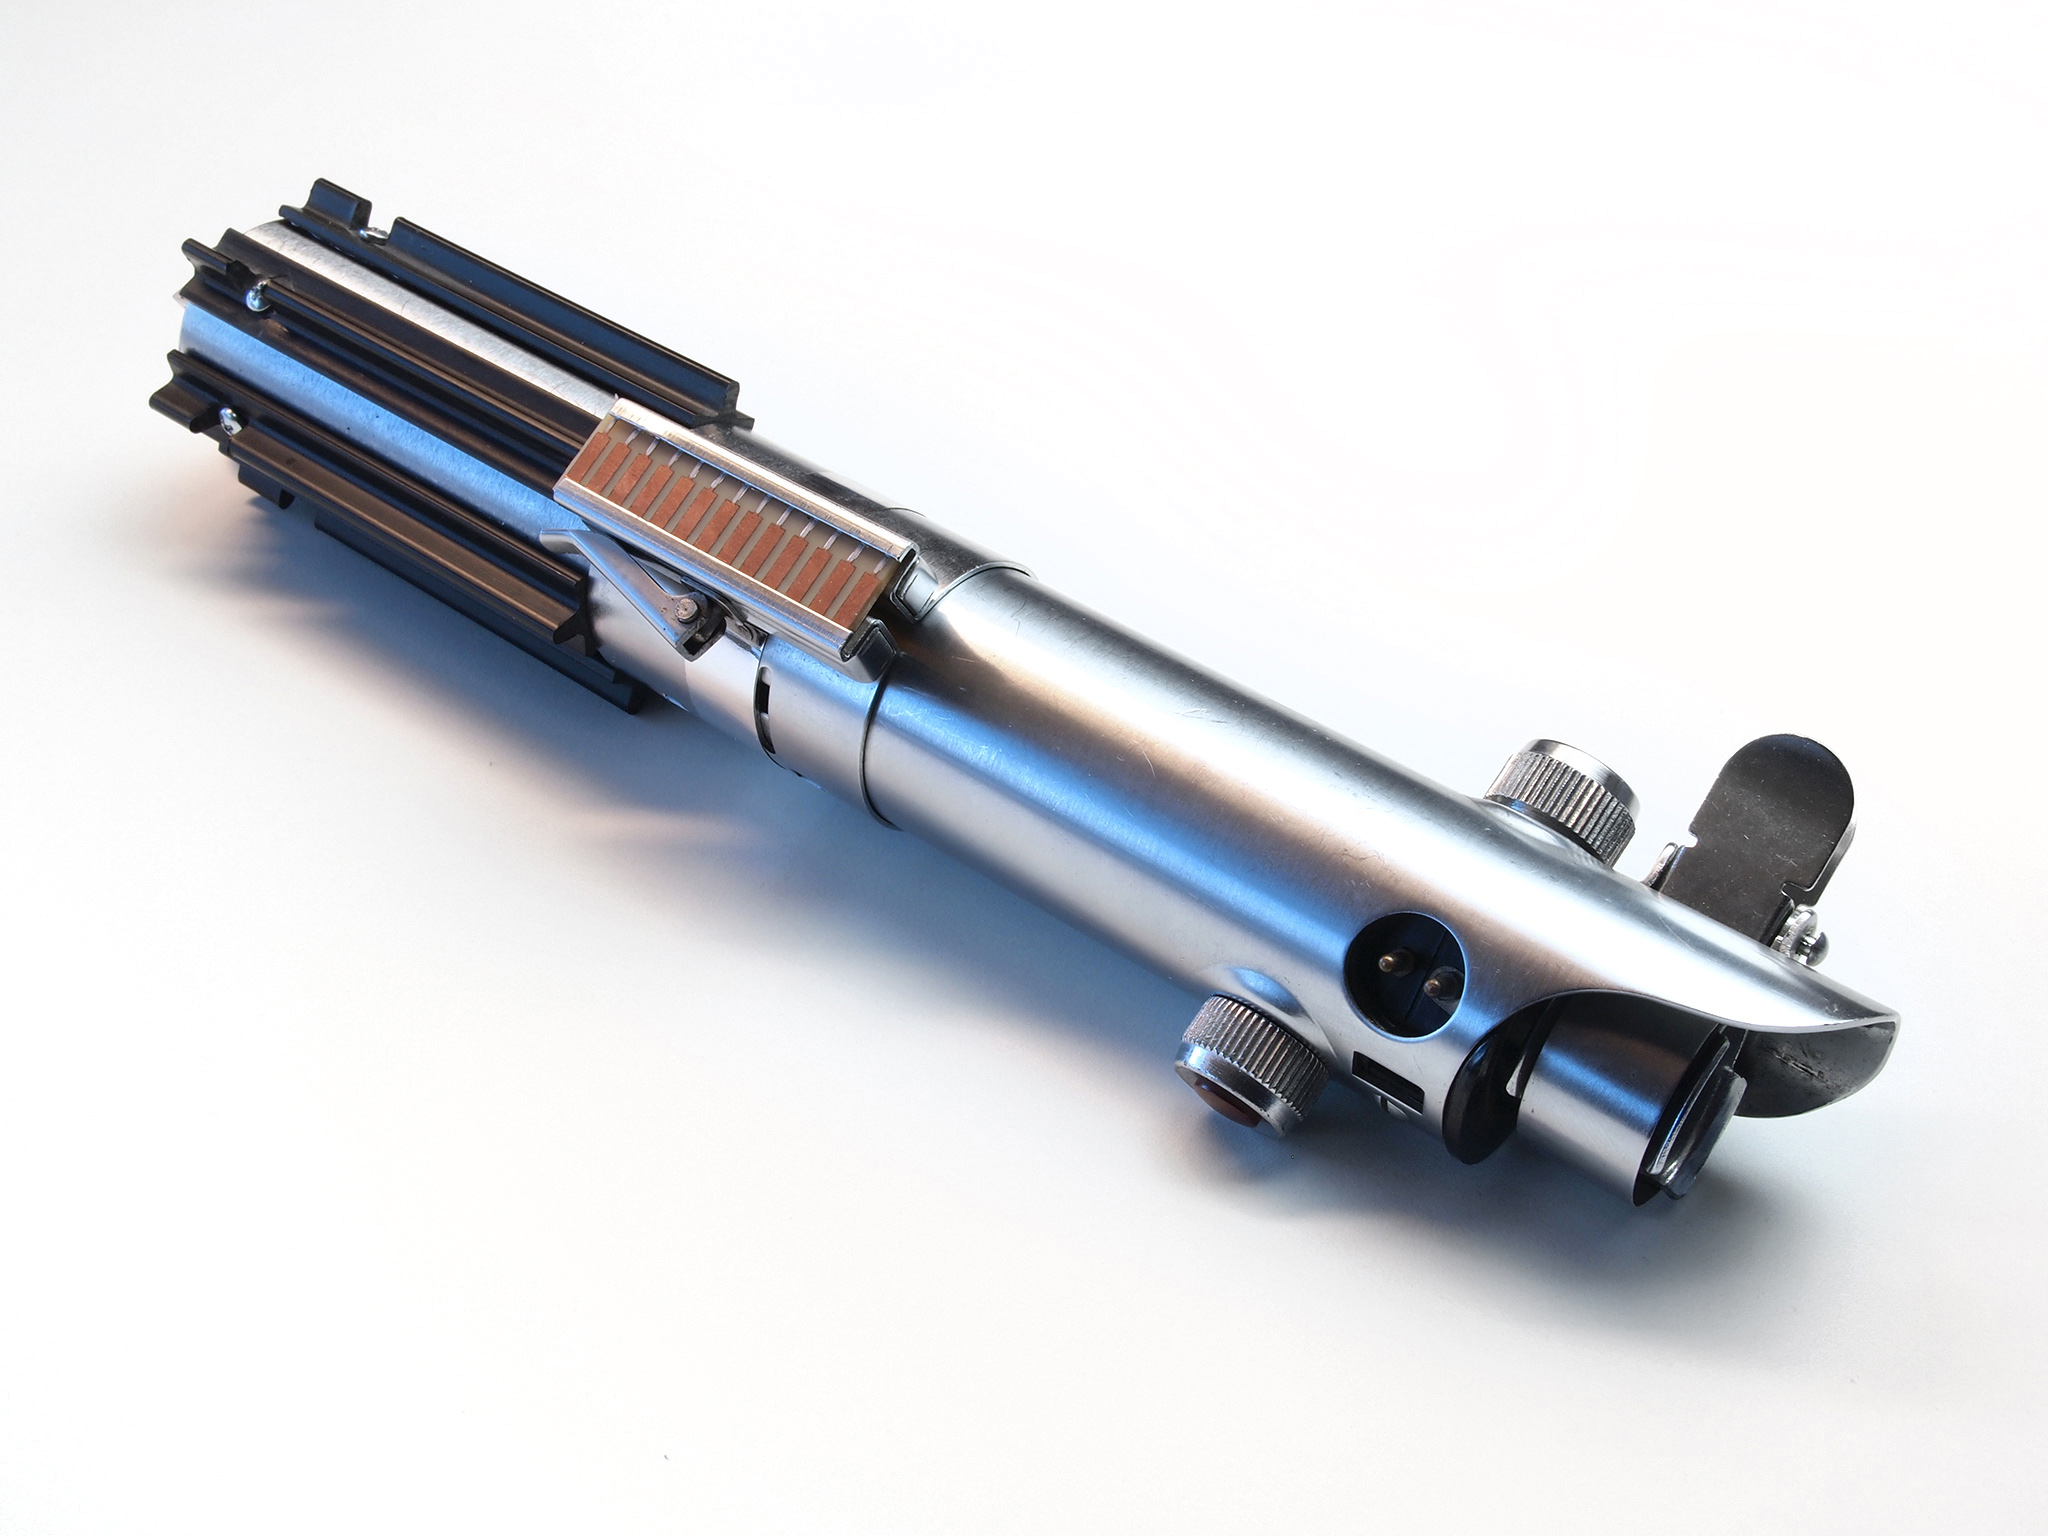
2. Apply 1/2″ metal (mylar) tape
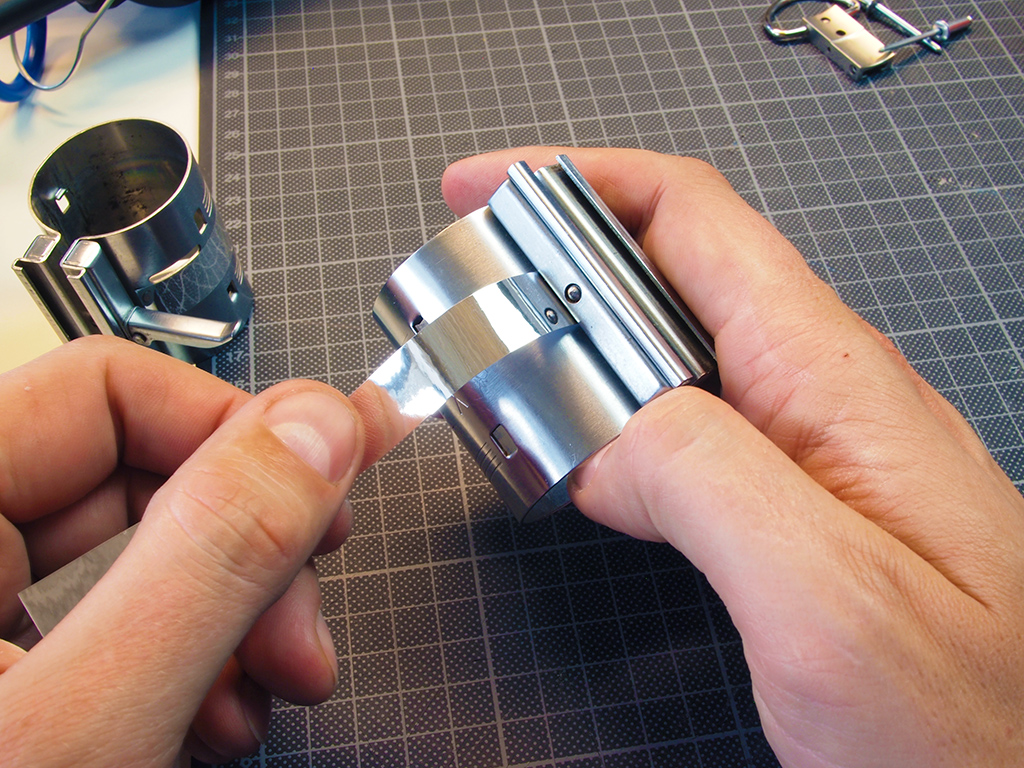
Remove the protective layer and attach the tape to cover the Graflex logo of the clamp.
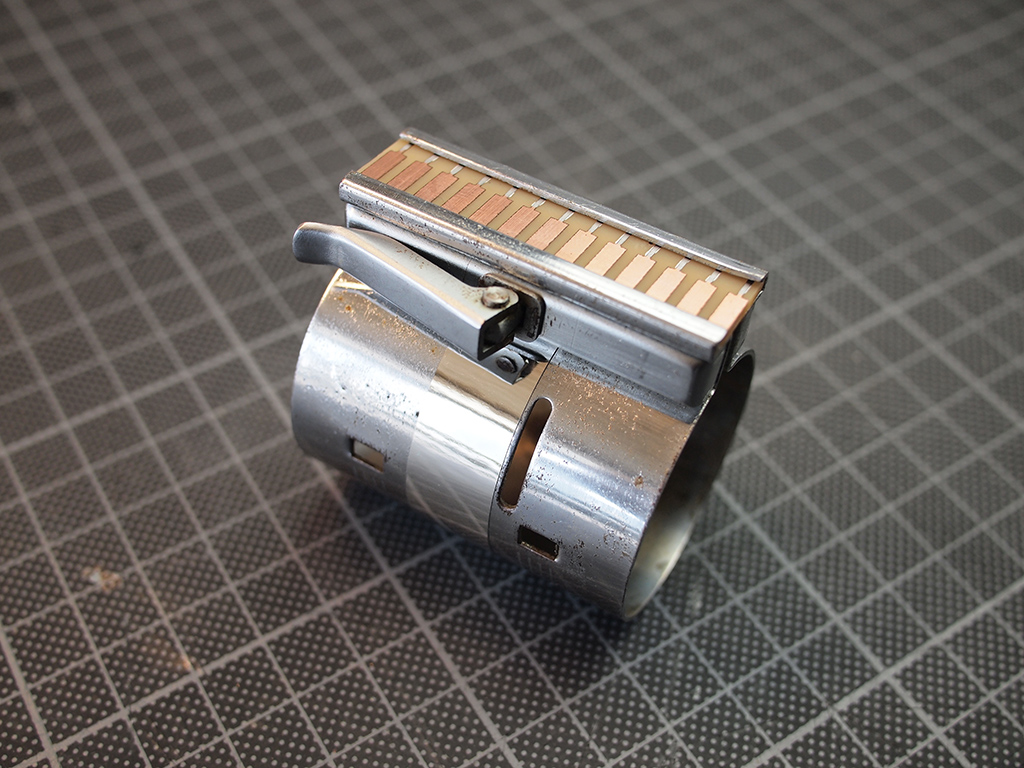
3. Apply scotch tape to edge connector
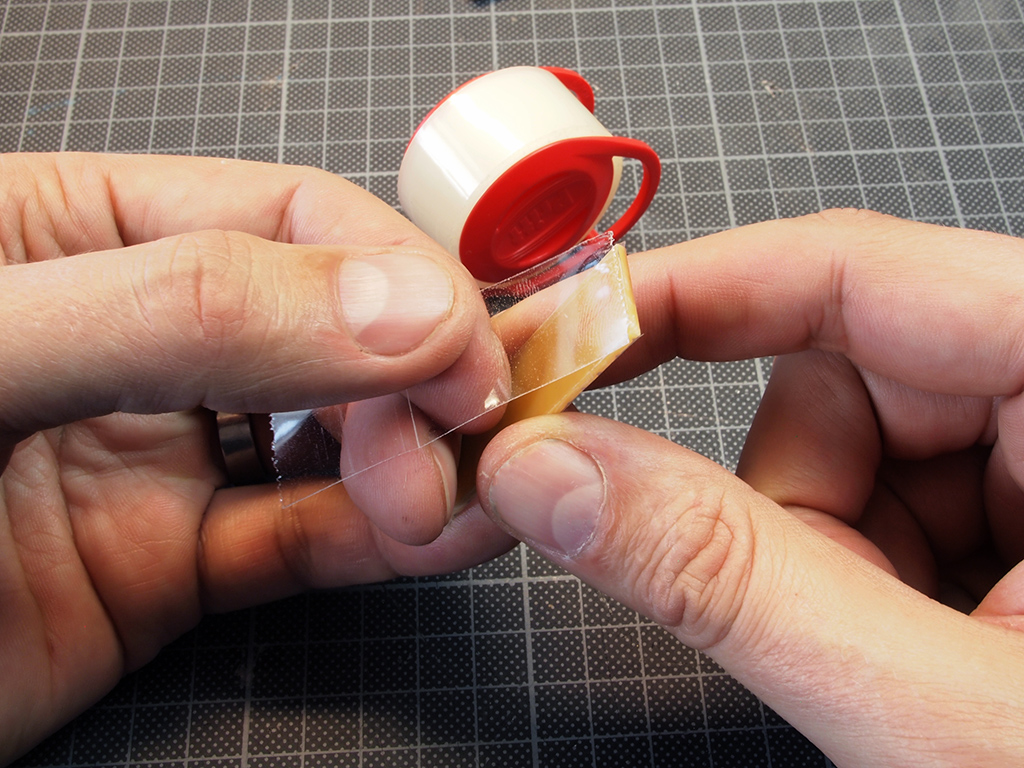
In order for the edge connector to sit fixed in the clamp, a piece of transparent tape will add some thickness so it will stay put. Put the edge connector in the clamp with the thick copper stripes closest to the clamp lever.
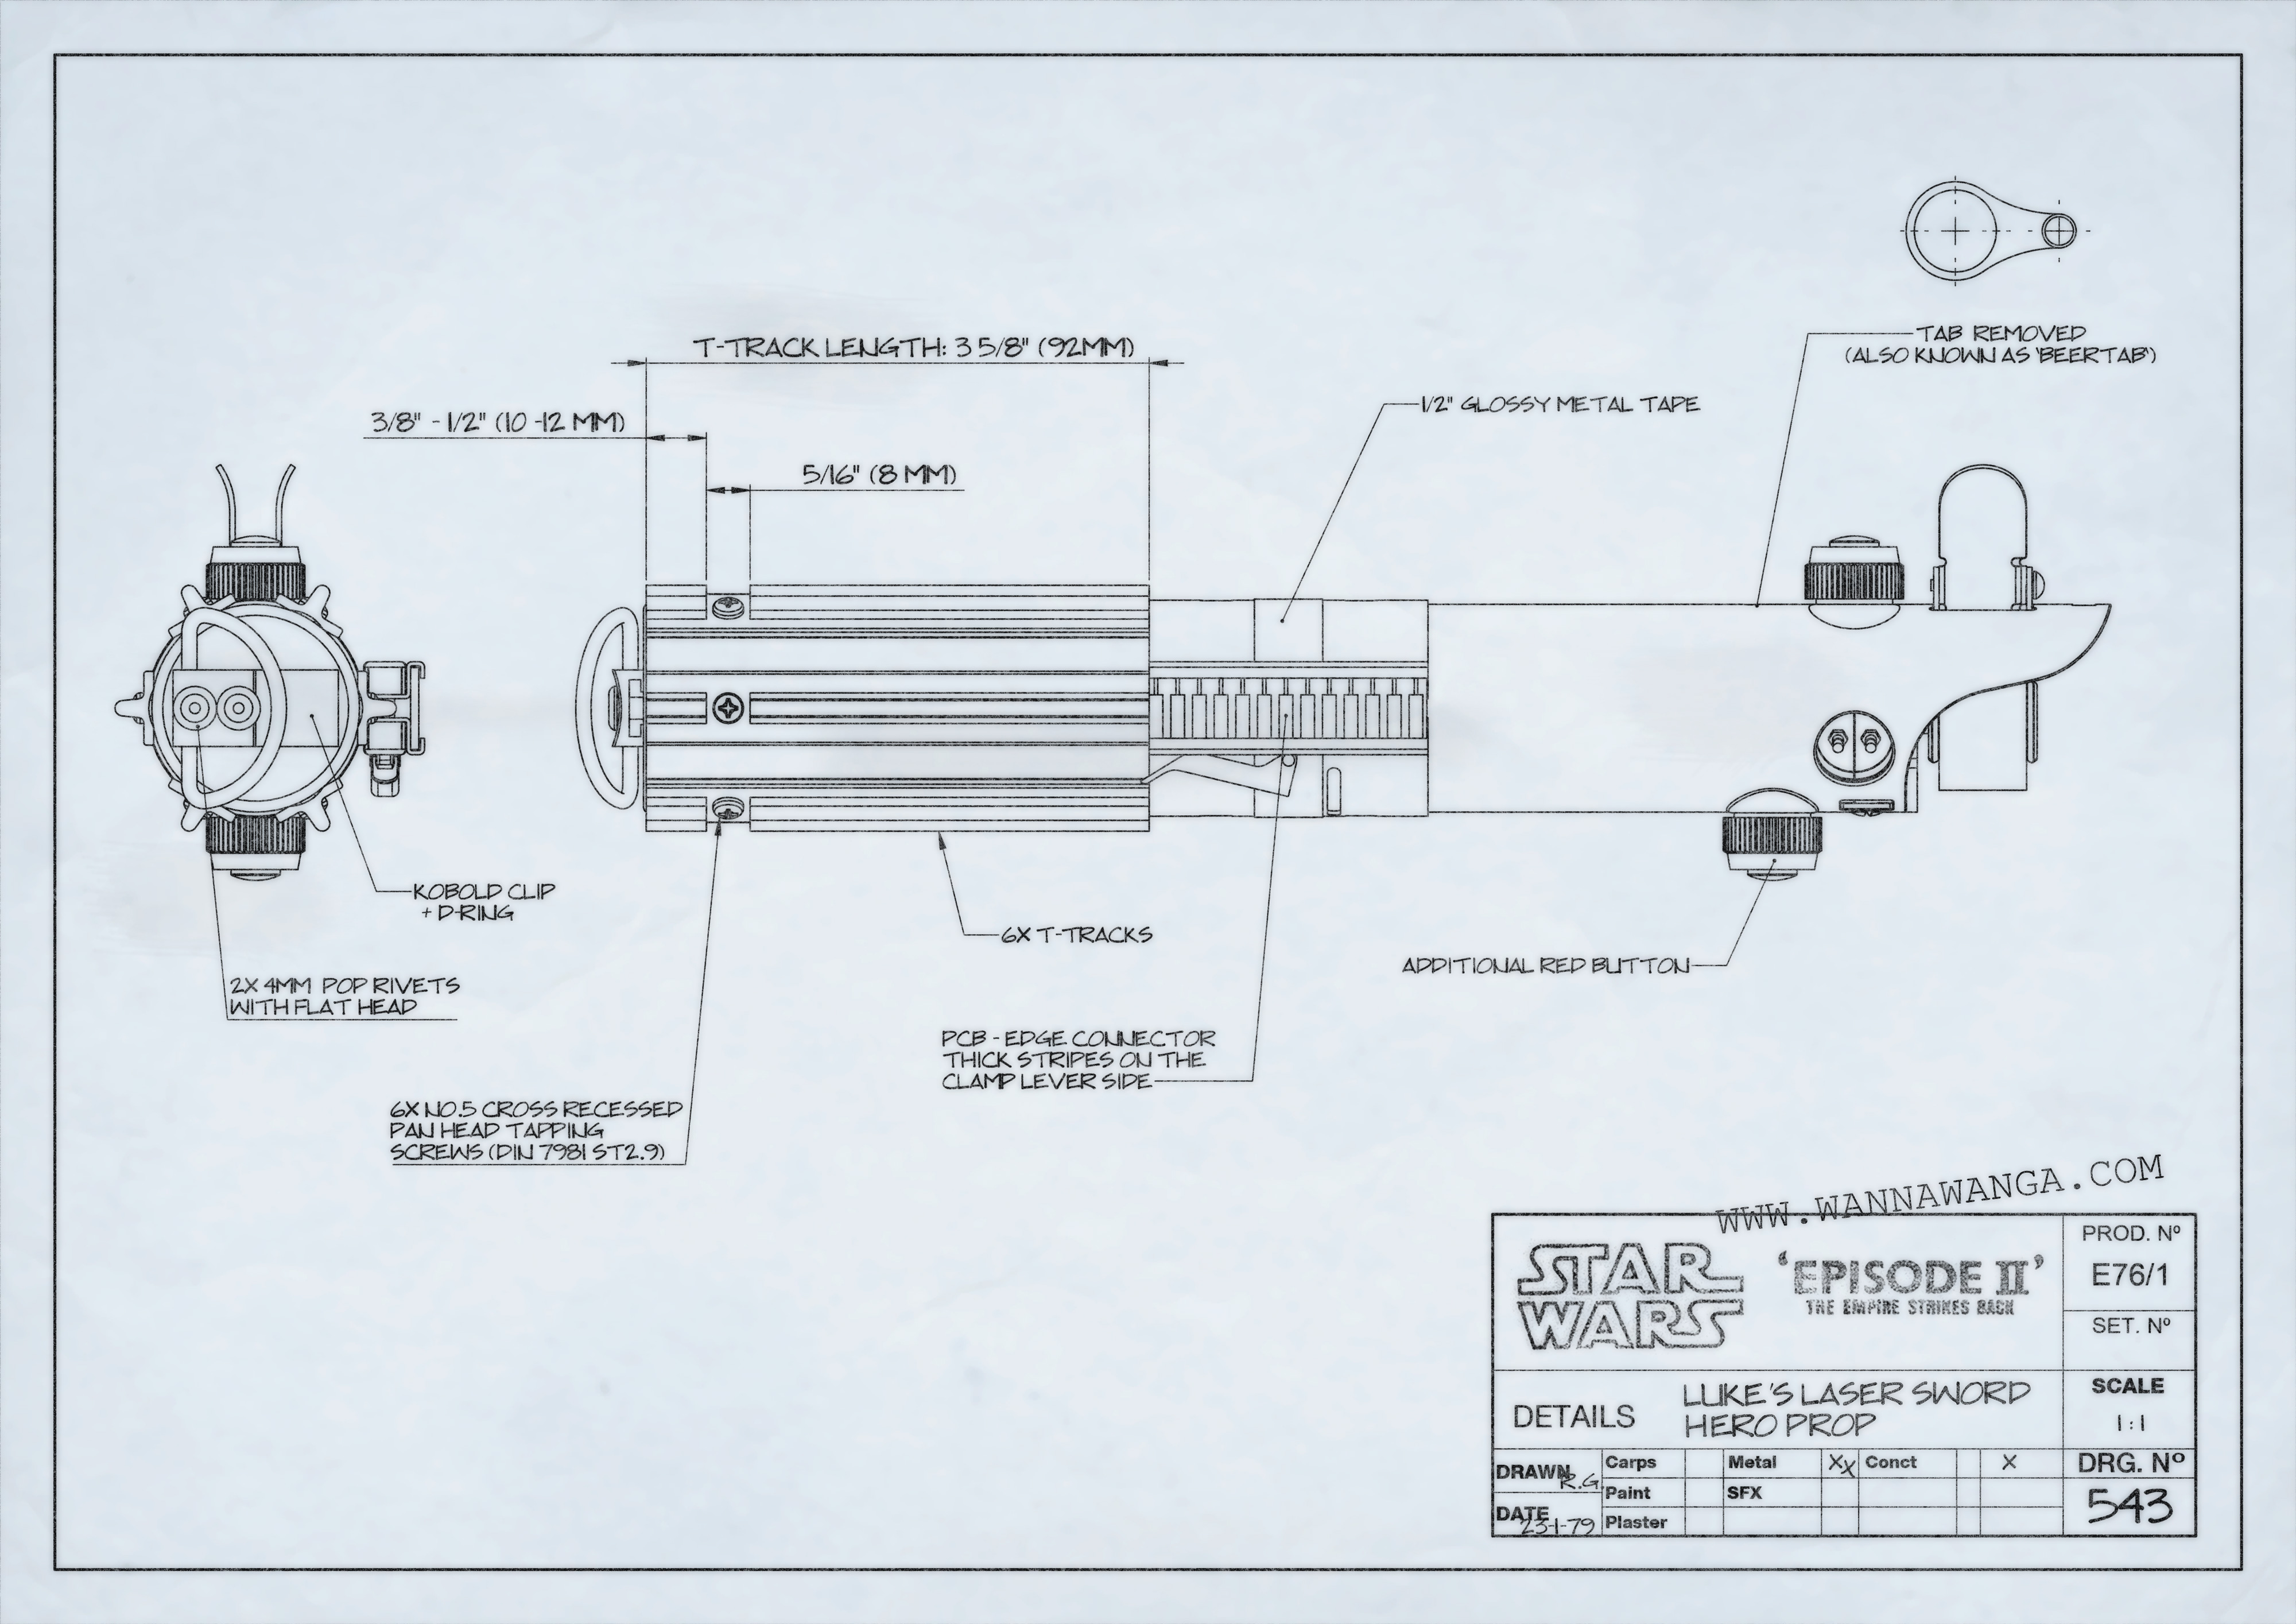
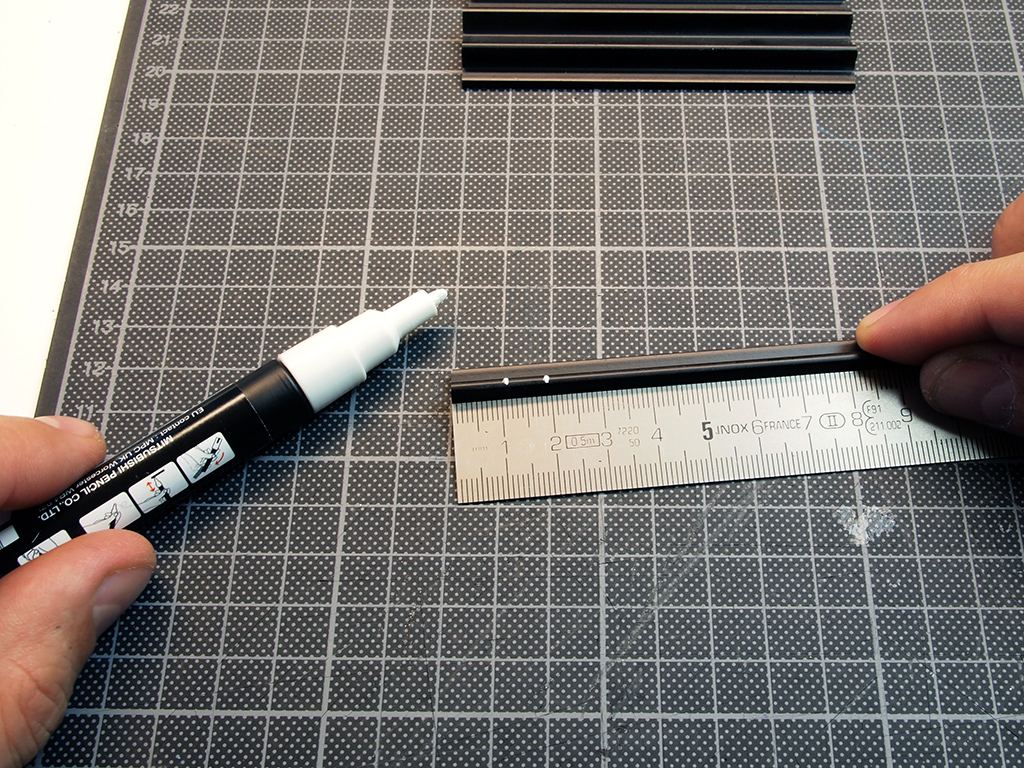
4. Cutting T-tracks to length
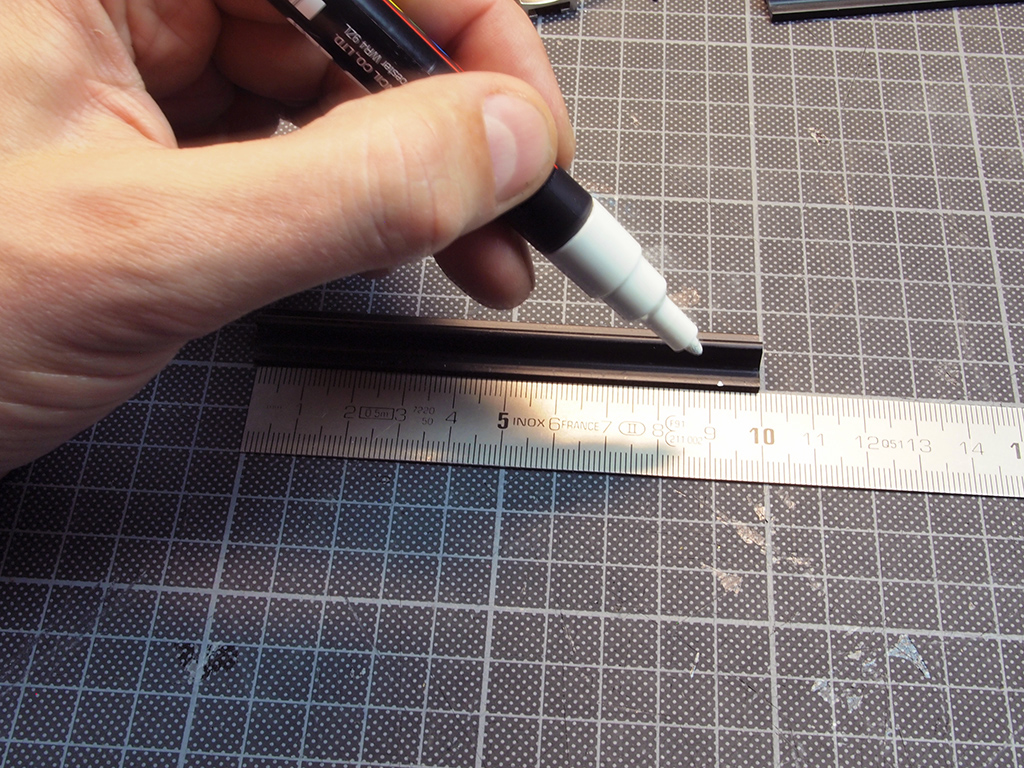
Make a marking on each of the six T-tracks with a marker. In this case I used a white paint marker. The length is 92mm (3 5/8″). Cut the T-track a little bit smaller (90mm) if you want to allow movement of the handle part in the Graflex clamp (see #6).

Cut the T-tracks using a miter saw (I use a small table circular saw).
5. Cutting the grooves
Make two marks on the edge of the T-track 8mm (5/16″) apart, and 10-12mm (3/8″ – 1/2″) from the edge of the T-track.
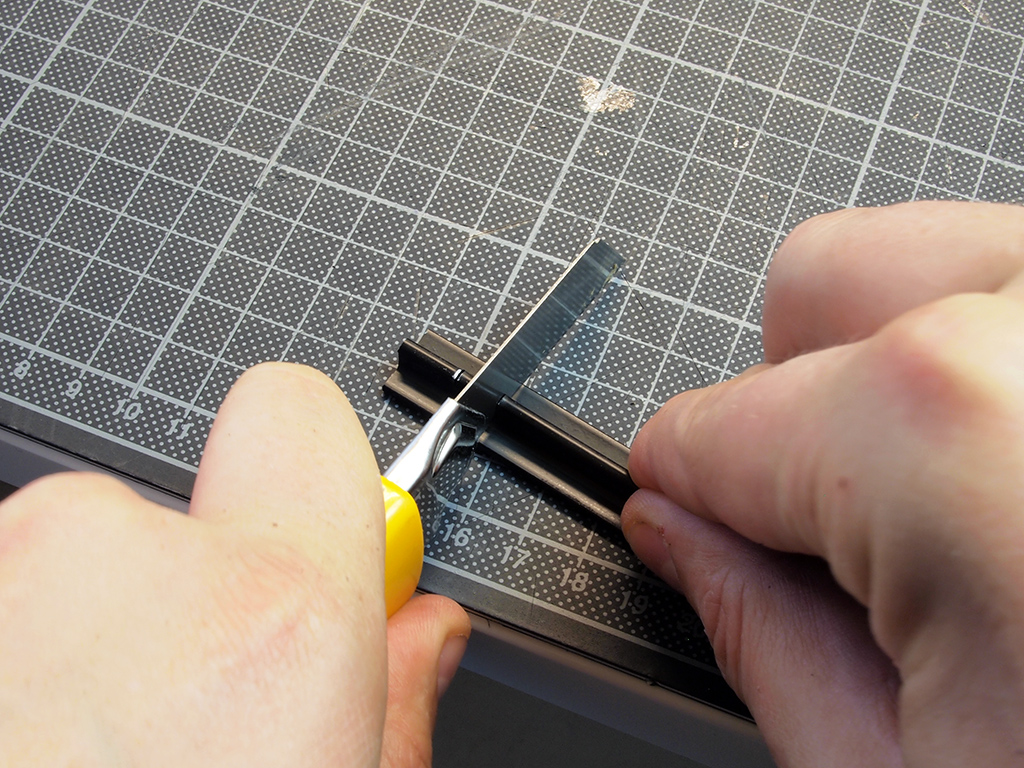
Make cuts on both markings of each track. This requires quite some force! Beware not to cut the base of the profile! This way the sides are straight and clean.
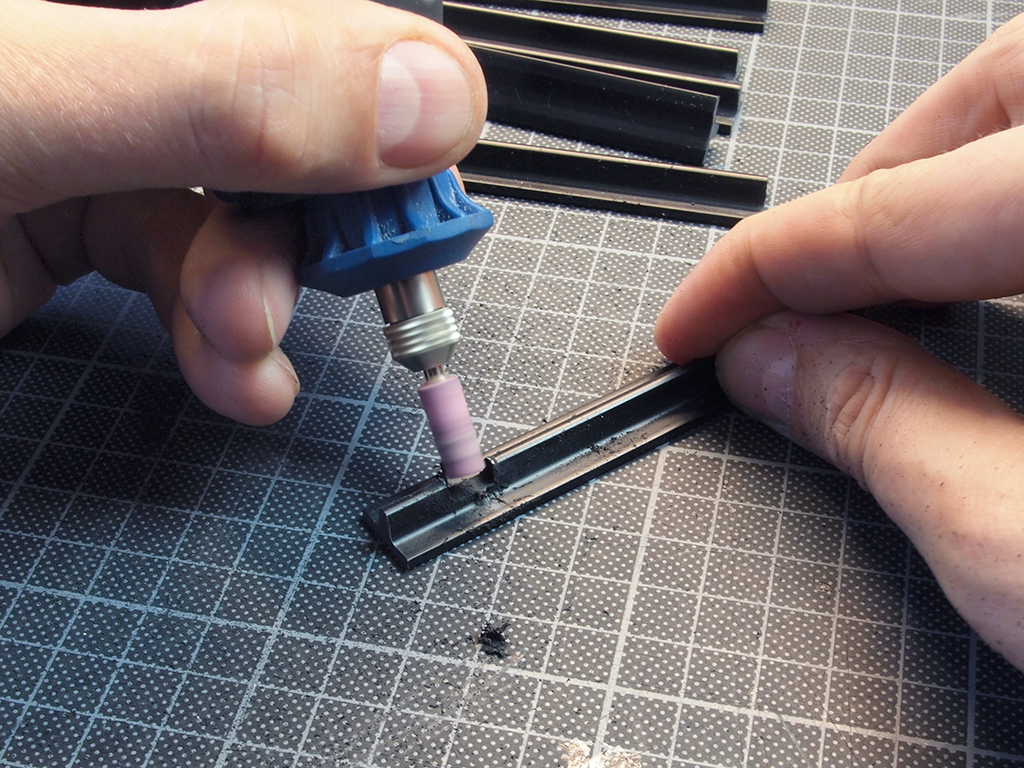
Use a rotary tool with small cylindrical ceramic bit to mill away the plastic in between the cuts. Do this carefully and try not to cut away material from the flat base of the profile. You might consider using paper (masking) tape to protect the flat base.

The result will look something like this.
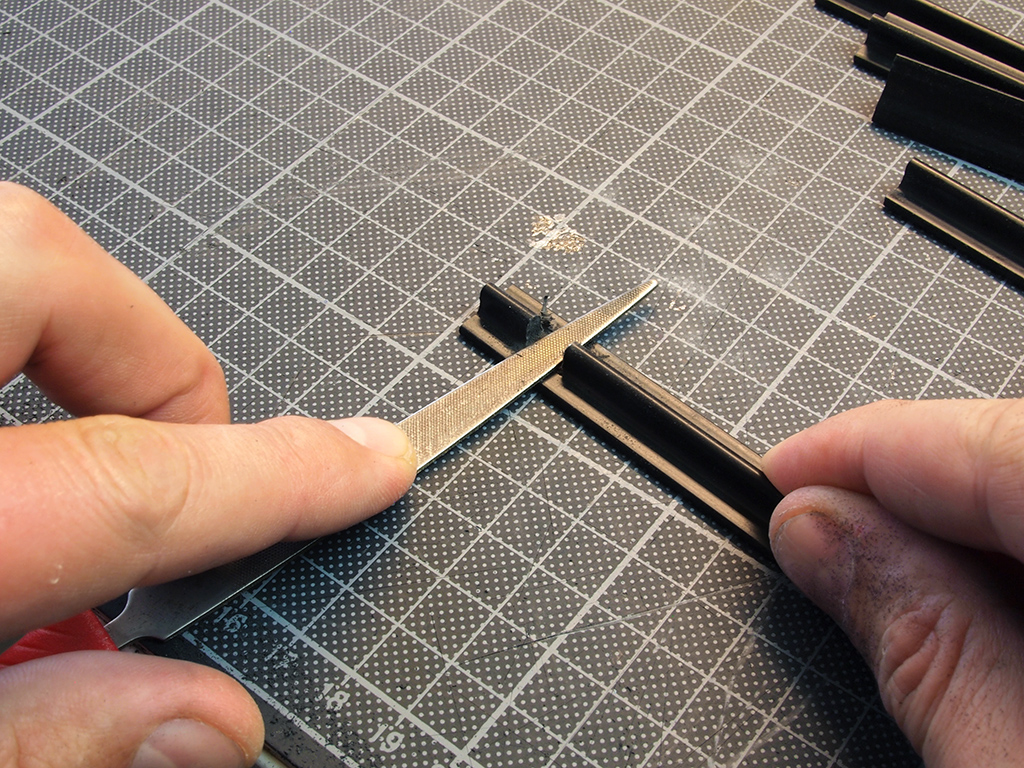
Use a file and sandpaper to create a smooth surface finish of the plastic T-tracks.
6. Gluing the T-tracks

Properly clean and degrease both the handle part of the Graflex and the bottom of the T-tracks. Slightly roughen the bottom of the T-tracks with sandpaper.

Take the 2-component epoxy glue and a wooden spatula. Put some on a cardboard and mix well. Use transparent glue with a curing time of around 5 minutes.
Put the Graflex handle inside the clamp.
Now this is important: if you want to be able to detach the handle part later, push the handle in the deepest position. Check the length of the T-tracks. For this deepest handle position, 92mm track might be slightly too long. Cut the T-tracks to 90 – 91 mm in this case. If you pull the Graflex handle to its longest position, the length of 92mm is correct, but you will not be able to detach the handle afterwards.
Apply a modest amount of glue in the bottom groove of a T-track and stick the first T-track in line with Graflex clamp.
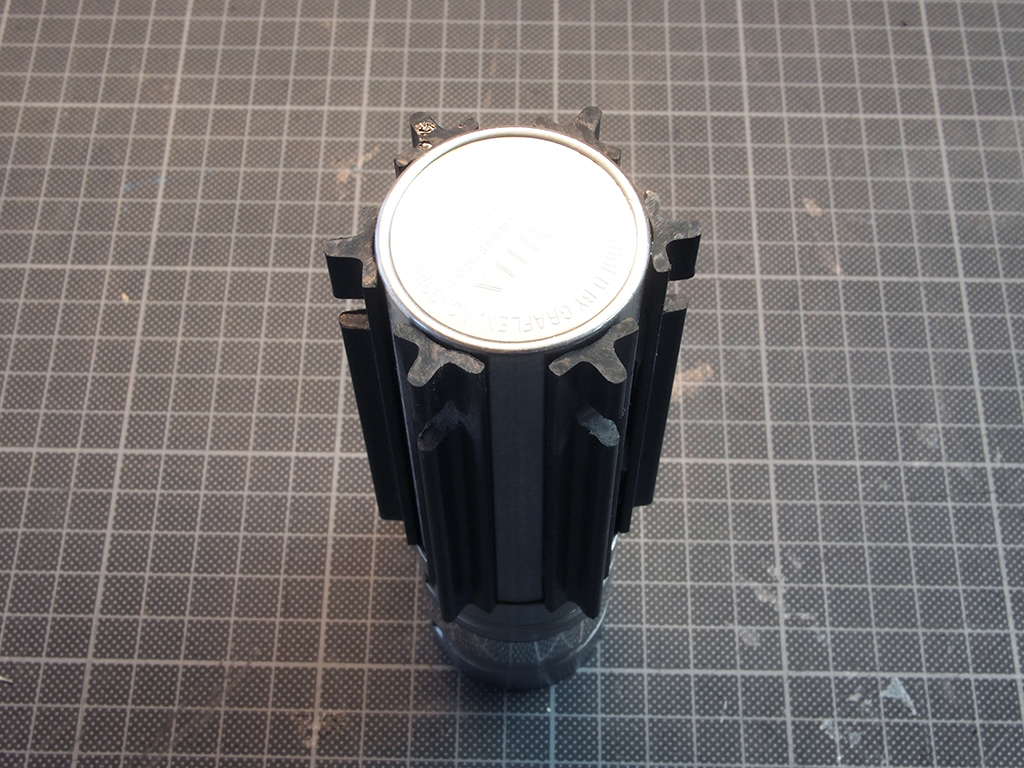
Now glue the second profile opposite the first one. Then place the third one on a 60 degree angle in between the other two (I did this by guessing by eye-sight). Place the fourth one in the middle of the gap next to the third one. Glue the last two opposite the third and fourth and you’re done.
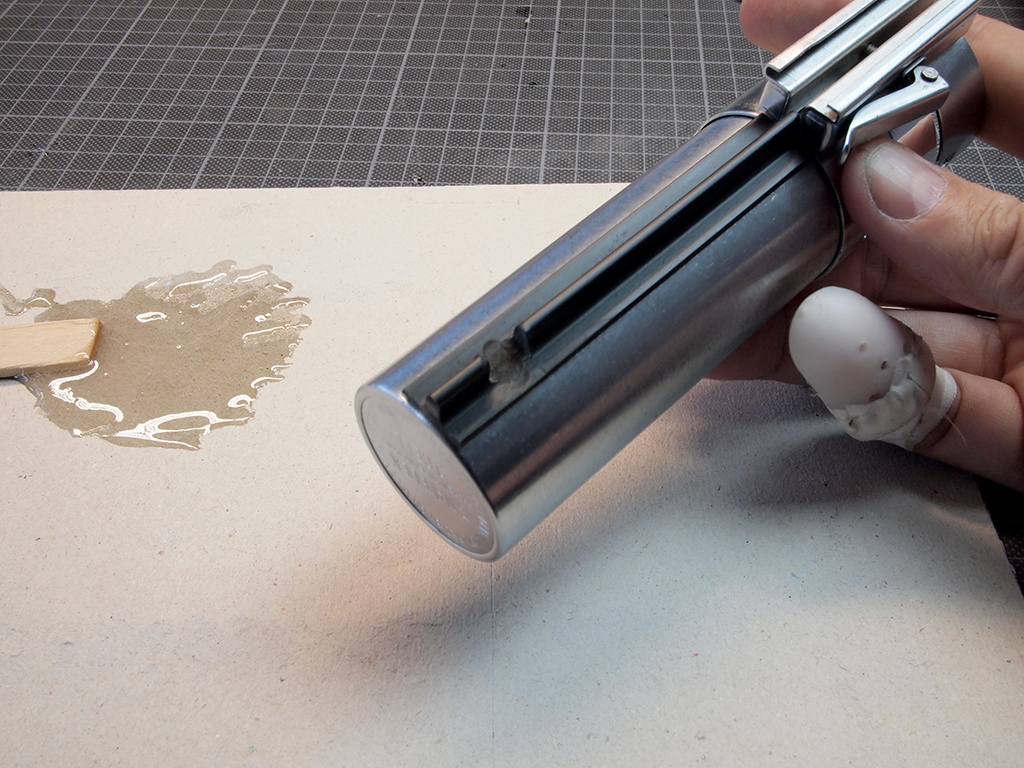
Leave the handle bottom up as in the picture for the epoxy to harden. (Check the leftover on the cardboard to check when it’s done!)
7. Removing the Graflex ‘beer tab’
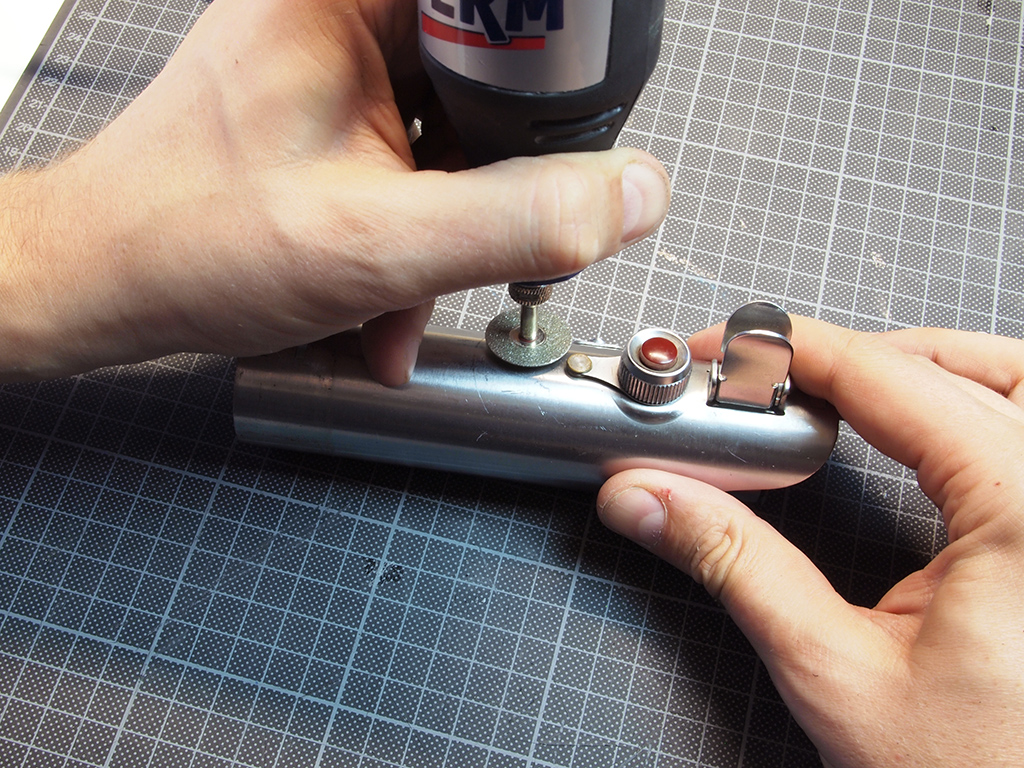
While the epoxy is curing, use the rotary tool with a circular grinding bit to cut away the beer tab fixation. This is easier than it looks. Watch it that you don’t scratch the rest of the Graflex. Remove the tab and take away as much of the fixation as possible. Put back the red button and replace the glass eye with the other red button in case you hadn’t done that already.
(It’s also possible to remove the connection of the tab from the inside by removing the innards. RPF-member dr_slurpee pointed this out to me)
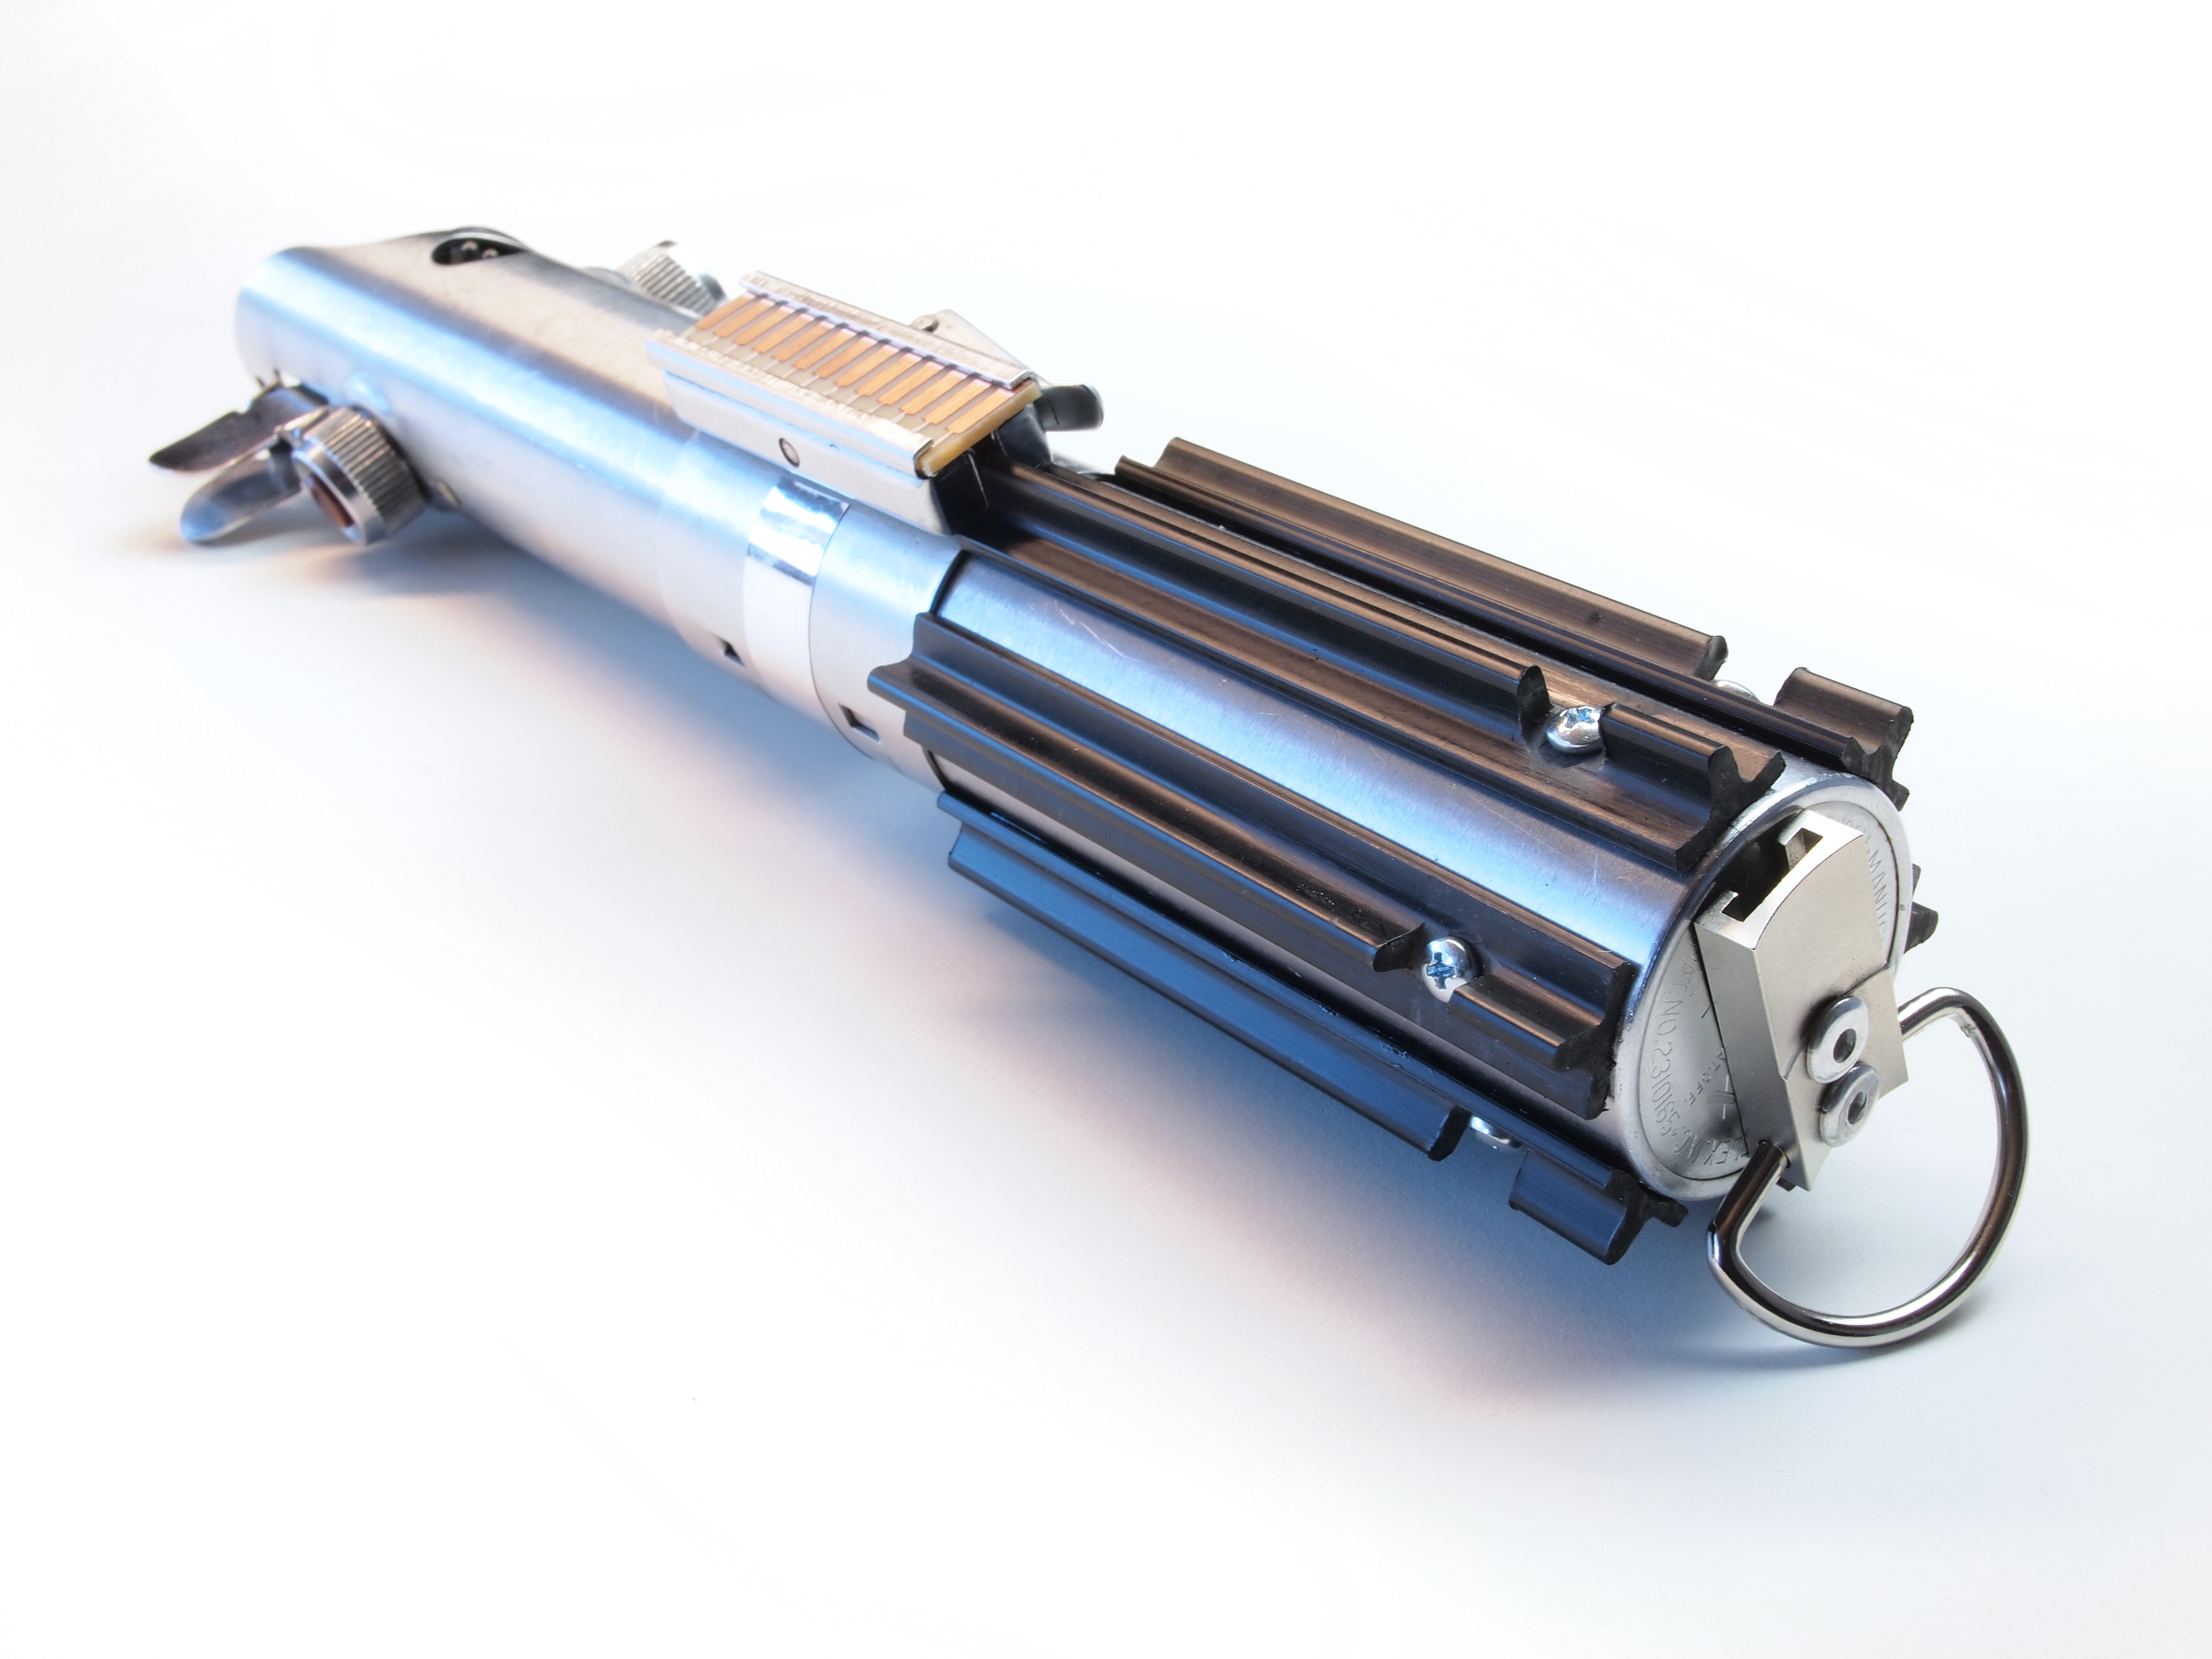
8. Attaching the Kobold Clip
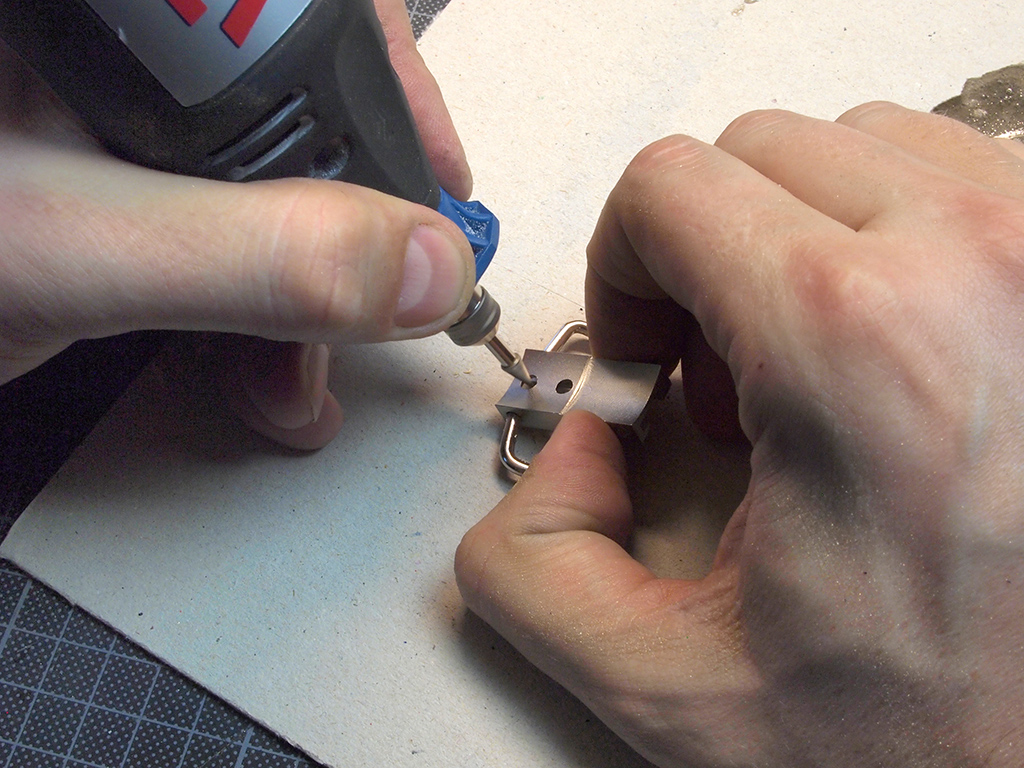
Enlarge (ream) the holes of the Kobold clip using the rotary tool to 4mm holes so that the rivets will fit. The original Kobold clip holes are 3mm.
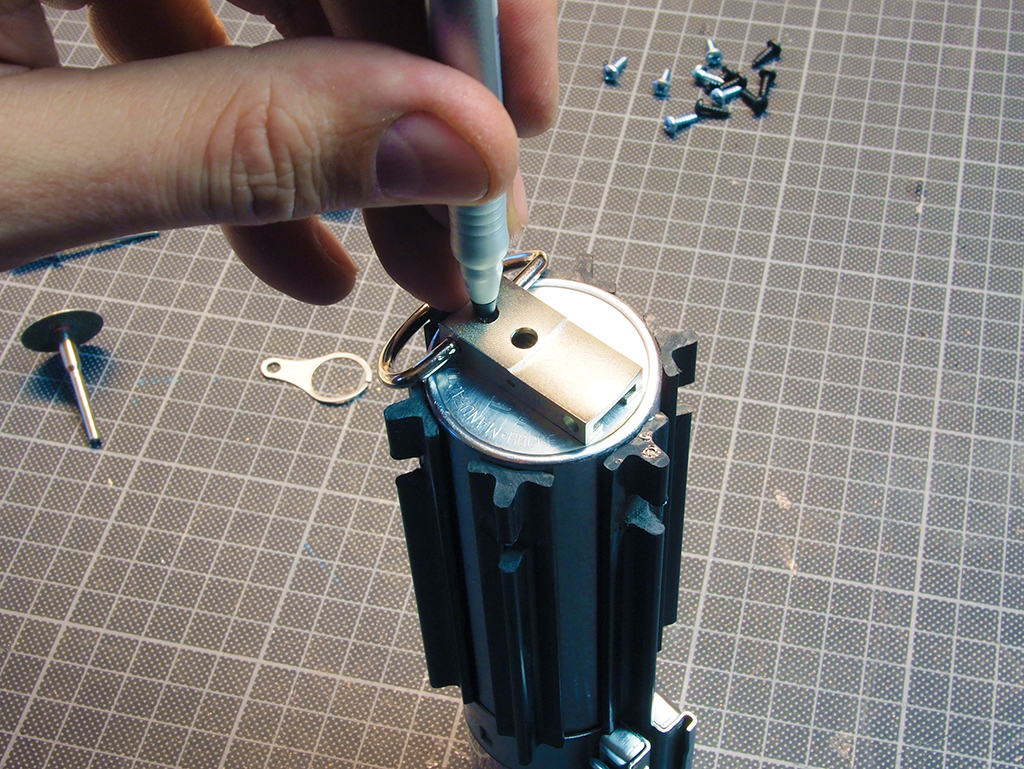
Place the Kobold Clip on the bottom of the handle orienting it in line with clamp as shown here. Mark the two holes with a permanent pen.
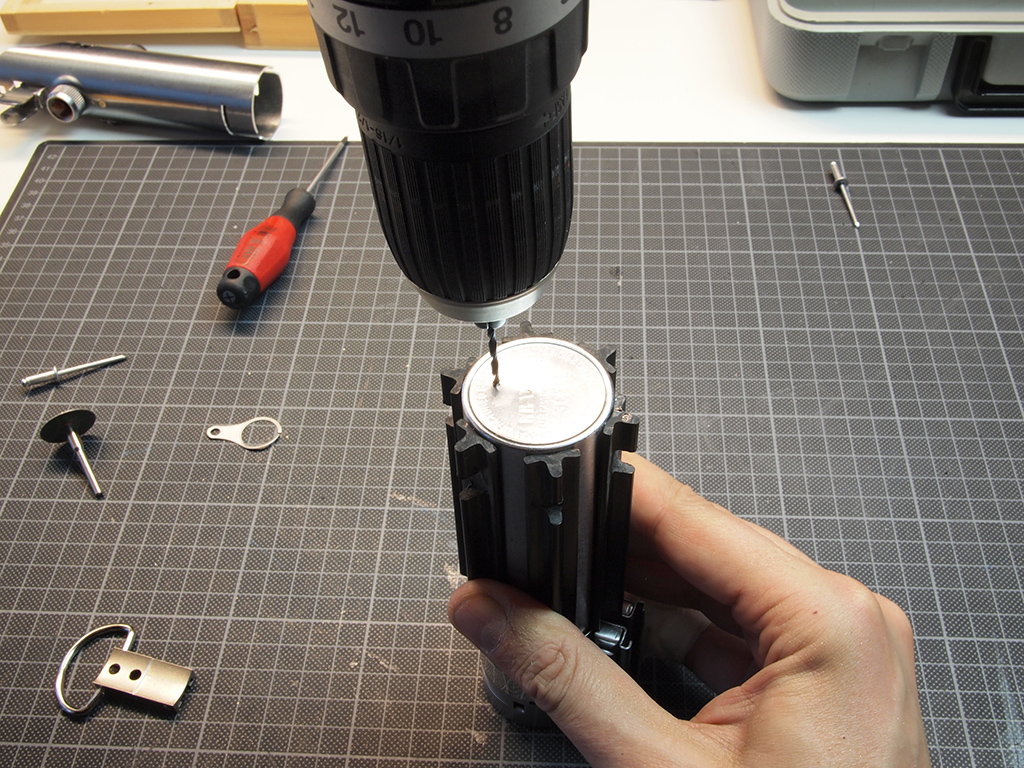
Carefully pre-drill (2mm) and drill (4mm) the two holes in the bottom.
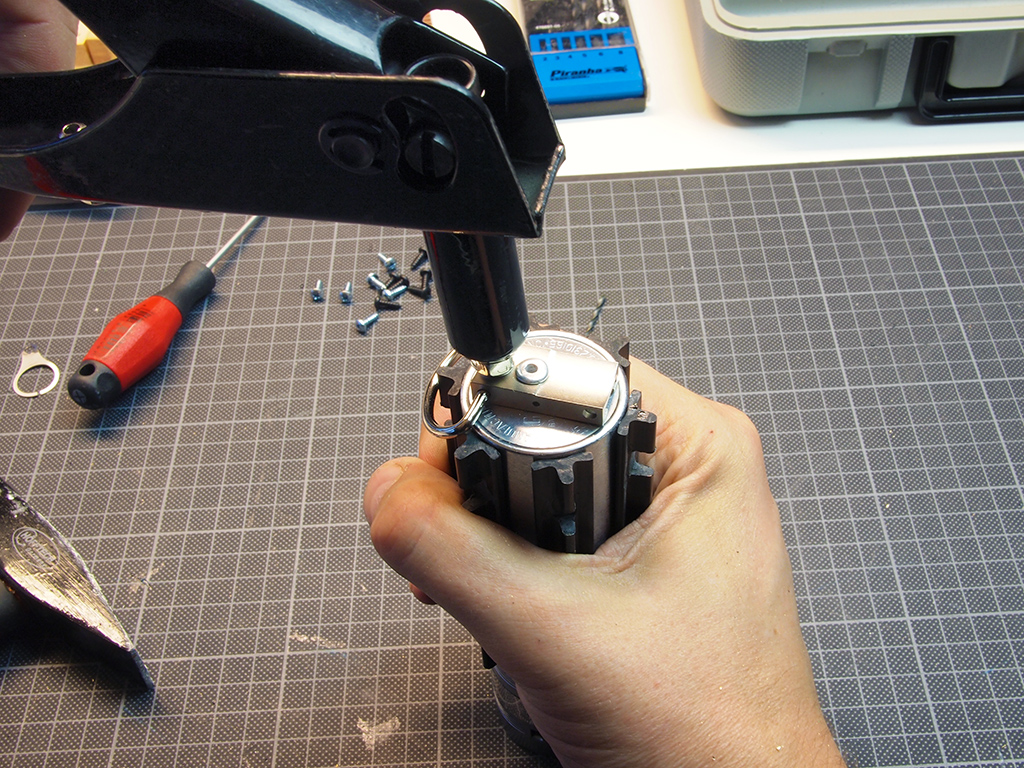
Use a rivet gun to attach the Kobold Clip with two flat head 4mm pop rivets. The Kobold is now tightly fixed to the handle! Almost done now!
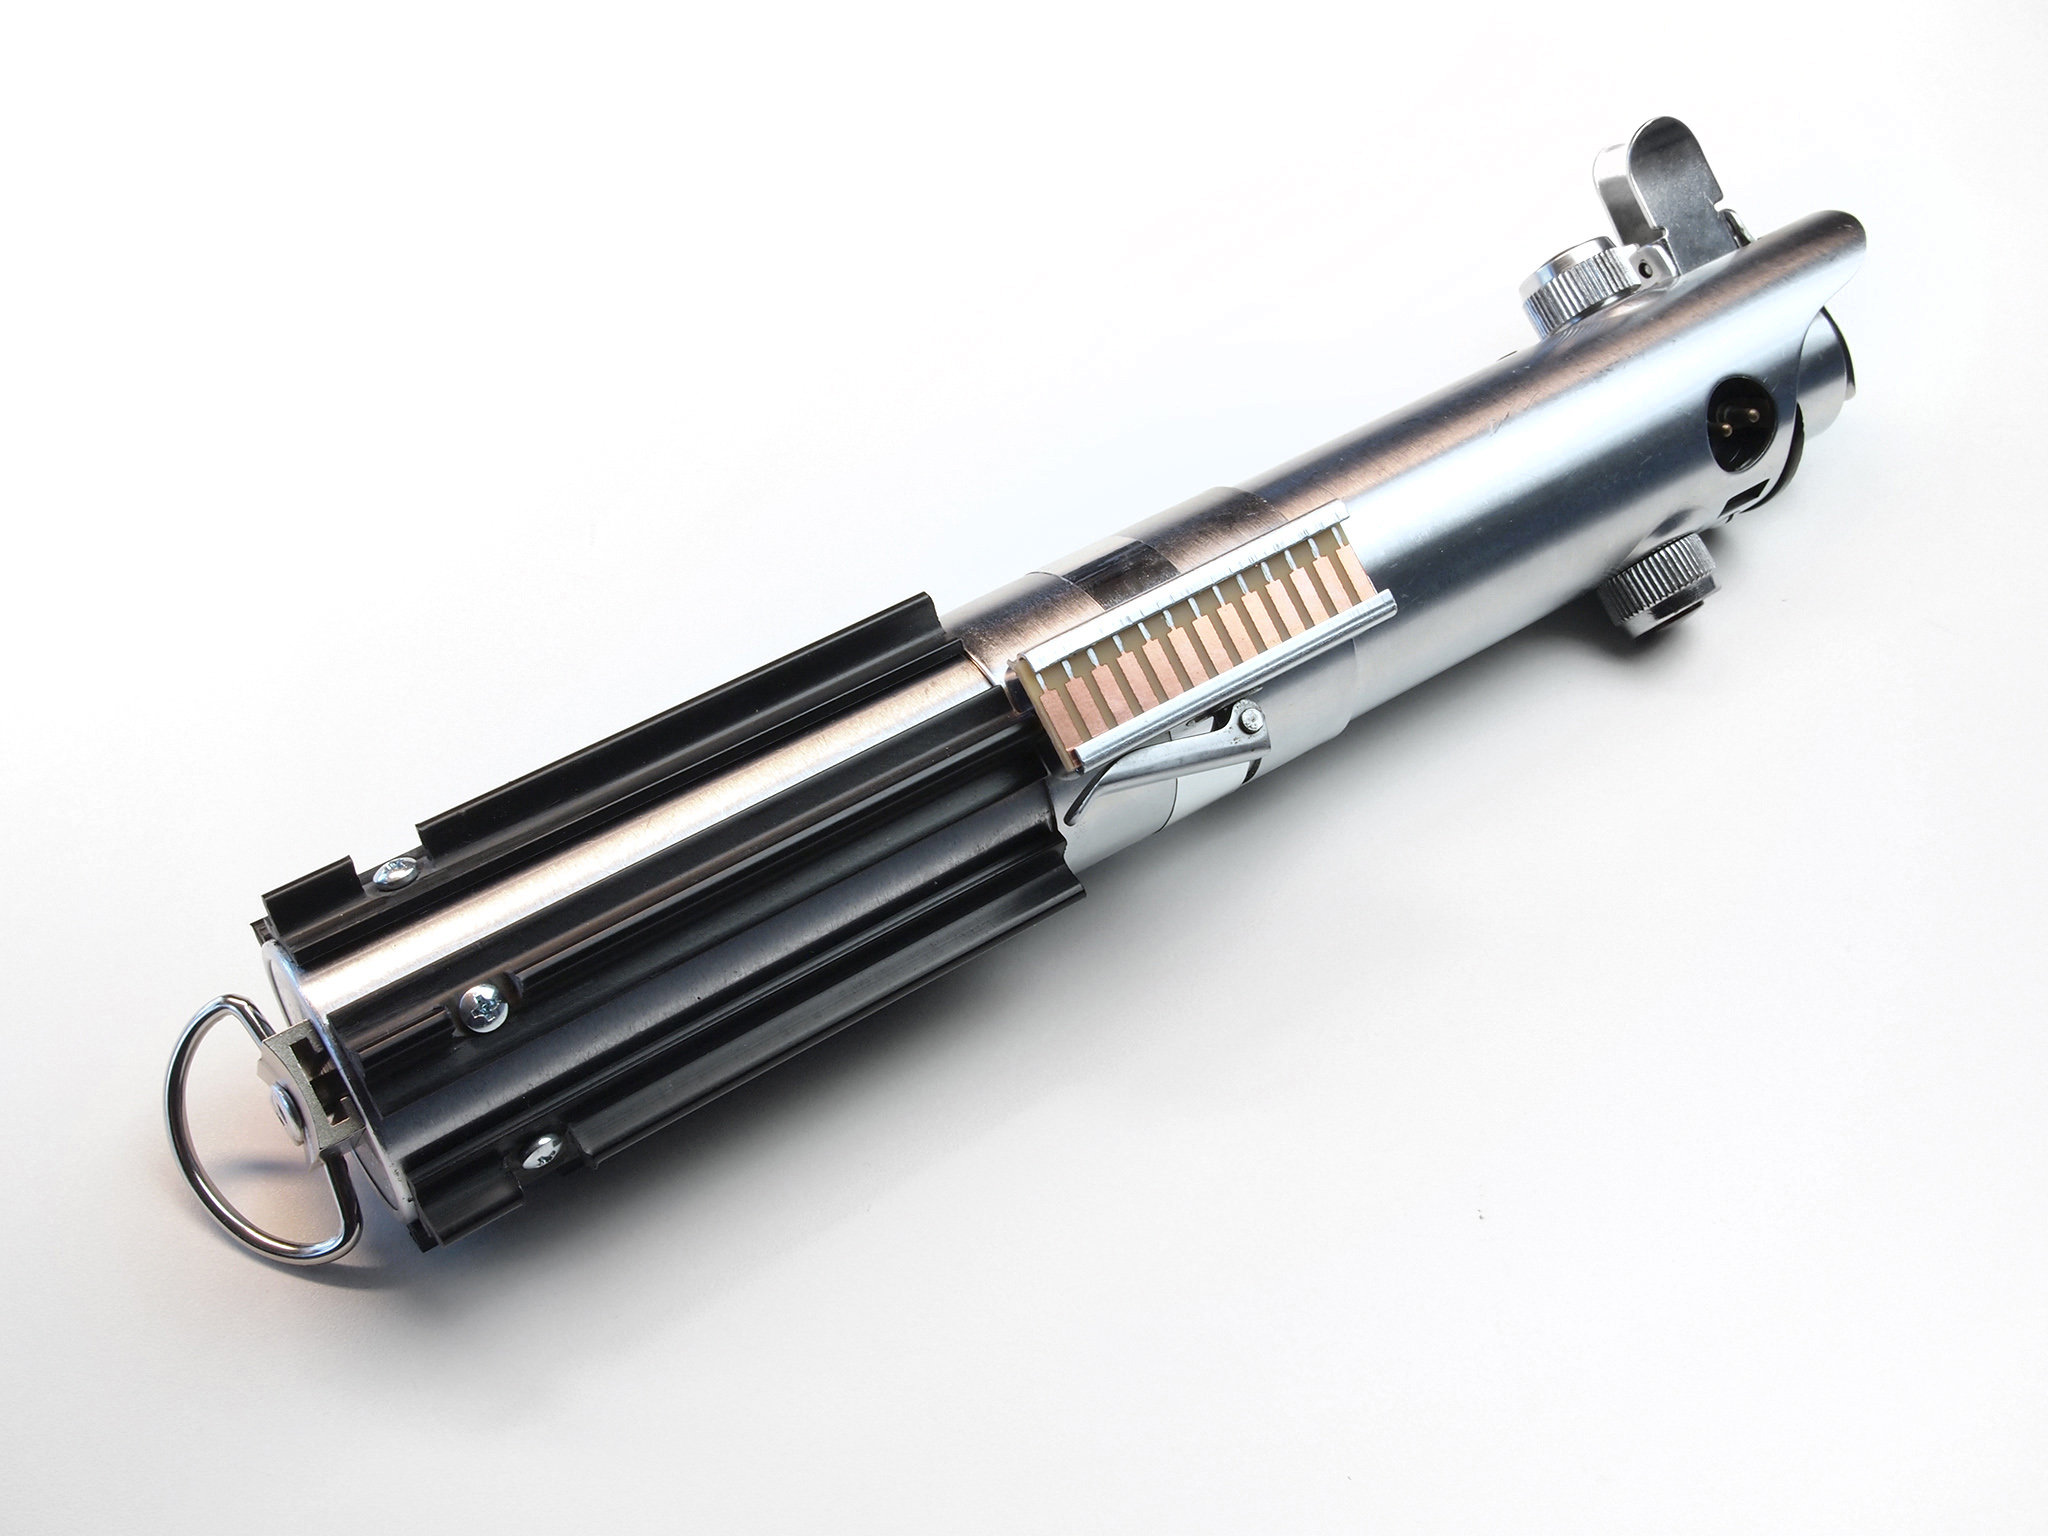
9. Attaching the screws
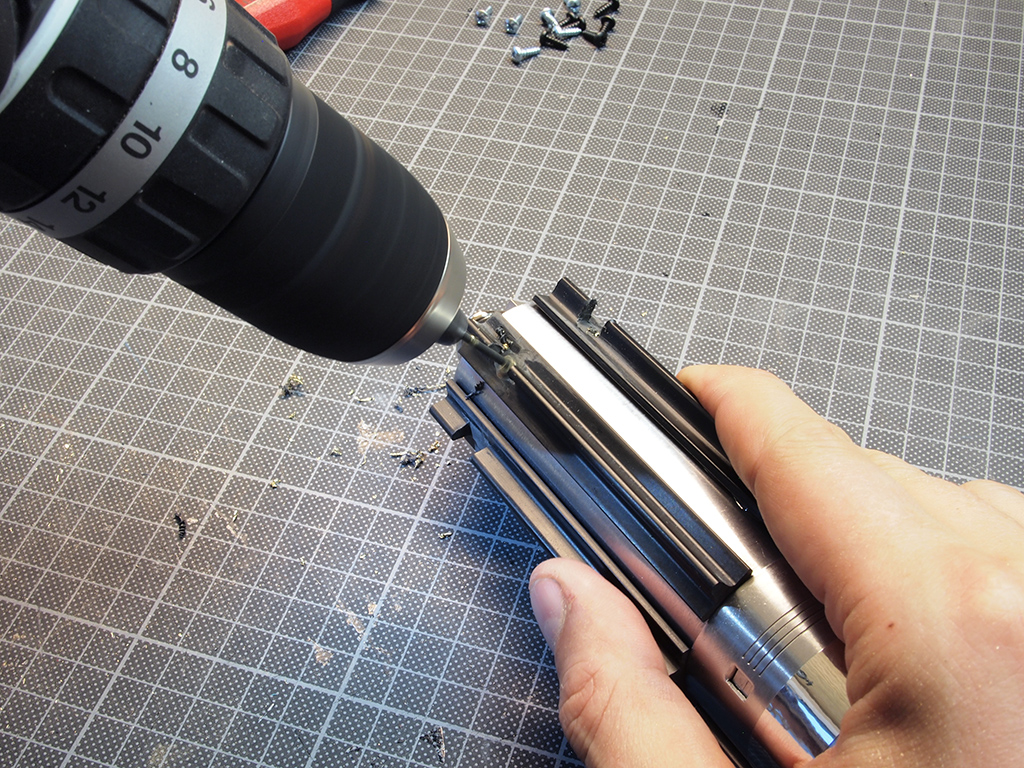
Use a 2.5mm (0.1″) drill bit and drill a hole in the center of each groove through both the plastic and the metal of the Graflex handle. Because of the T-track plastic, this can be easily done by hand.
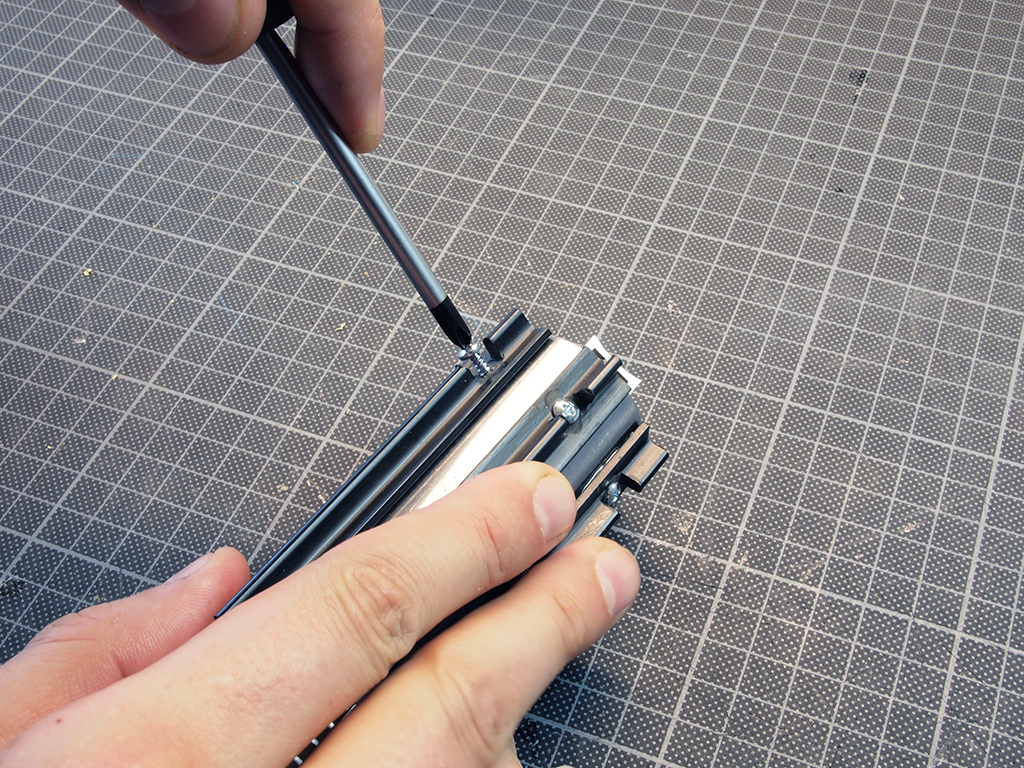
Screw in the six metal cross recessed pan head tapping screws.
10. Put it all together
Assemble the Graflex top inside the clamp (watch it that you put it in the correct position!).
Clean up all the mess you made and you’re all done!